Are you looking to create moments of relaxation and stress relief for your loved ones?
Learning how to give a massage at home is a wonderful skill to acquire. Whether it’s for your partner, a friend, or a family member, offering a soothing massage can be a gesture of love and care.
In this comprehensive guide, we’ll walk you through the art of home massage, covering techniques for the back, neck, shoulders, and full body.
So without further ado, let’s get started.
How to Give a Back Massage at Home?
Giving a back massage is a great way to relieve tension and promote relaxation. Here’s a step-by-step guide to get you started:
Step 1: Prepare Your Space
Begin by creating a serene atmosphere in the room where you’ll be giving the massage.
Soft, ambient lighting and soothing background music can set the perfect mood. Ensure the recipient’s comfort by laying out a plush surface like a comfortable bed or a dedicated massage table.
The goal is to create an environment where relaxation can flourish.
Step 2: Choose the Right Massage Oil
Selecting a high-quality massage oil is crucial for a smooth and enjoyable massage experience. Opt for oils specifically designed for massages to reduce friction between your hands and the recipient’s skin.
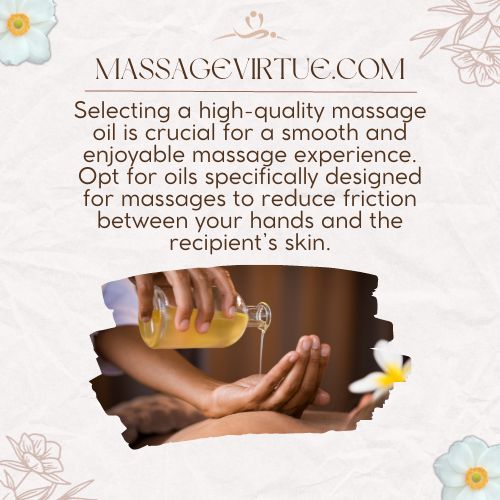
Start by applying a small amount to your hands and gently warming it up before you begin the massage.
Step 3: Begin with Effleurage
Effleurage serves as the introductory technique to warm up the recipient’s muscles.
Employ long, fluid strokes that glide from the lower back and gradually ascend to the upper back and shoulders.
The gentle touch of effleurage helps relax the muscles and prepare them for deeper massage techniques.
Step 4: Move to Petrissage
Transition into the petrissage technique, which involves kneading the muscles gently. Utilize your palms and fingers to knead the muscles located on either side of the spine.
Begin at the lower back and work your way up towards the shoulders, ensuring a steady, rhythmic motion.
Petrissage helps release tension and promotes blood circulation.
Step 5: Focus on Knots and Tension
While massaging, keep an attentive eye out for knots or tense areas in the recipient’s muscles.
When you encounter these points of tension, use your fingers to apply deliberate and firm pressure in a circular motion.
This technique can effectively target and release muscle knots, offering relief and relaxation.
Step 6: Finish with Effleurage
Conclude the back massage session with another round of effleurage.
These soothing, long strokes reiterate the calming effect of the initial effleurage, leaving the recipient feeling deeply relaxed.
It serves as a gentle conclusion to the massage, ensuring the muscles are thoroughly relaxed and tension-free.
How to Give a Neck and Shoulder Massage at Home?
Neck and shoulder massages are perfect for alleviating stress and tension in these commonly affected areas. Follow these steps for an effective neck and shoulder massage:
Step 1: Position Your Recipient
To begin a neck and shoulder massage, have your recipient sit comfortably, ensuring their shoulders are exposed. Provide additional support by placing a cushion or a rolled-up towel under their neck.
This position promotes relaxation and accessibility for the massage.
Step 2: Start with Gentle Strokes
Initiate the massage with gentle, circular strokes on the neck and shoulders.
These light, soothing motions serve as a warm-up, preparing the muscles for deeper shoulder massage techniques while inducing a sense of calm and comfort.
Step 3: Apply Pressure to Knots
As you continue, pay attention to any knots or areas of tightness. Use your fingers to apply gentle yet deliberate pressure in circular motions over these spots.
This targeted approach helps release tension and provides relief to knotted muscles.
Step 4: Neck Stretching
Incorporate neck stretching into the massage by gently tilting your recipient’s head from side to side.
Encourage them to rotate their neck, allowing for a gradual release of built-up tension in the neck muscles. This step enhances flexibility and relaxation.
Step 5: Shoulder Squeezes
Utilize your thumbs and fingers to apply gentle pressure to the shoulders. Employ a squeezing or pinching motion to address muscle tension effectively.
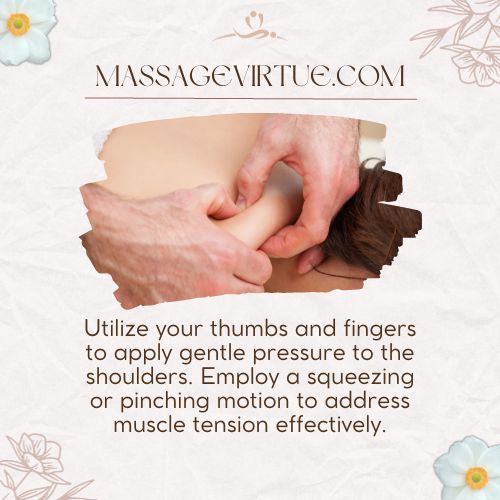
This technique relieves stress and discomfort in the shoulder area, promoting relaxation.
Step 6: Finish with Relaxation
Conclude the neck and shoulder massage with a final round of light, soothing strokes.
These gentle motions serve to induce a deep sense of relaxation, leaving the recipient feeling tension-free and thoroughly at ease.
This closing step ensures the massage experience is truly rejuvenating.
How to Give a Full Body Massage at Home?
A full-body massage is the ultimate way to provide complete relaxation. Here’s a step-by-step guide:
Step 1: Set Up the Space
Before starting a full-body massage, ensure you have ample space to access every part of the body comfortably.
Choose a suitable surface, such as a massage table or a bed, to accommodate the recipient. Proper space setup ensures you can provide a seamless and uninterrupted massage experience.
Step 2: Use the Right Oil
Select an appropriate massage oil designed for full-body use.
Begin by applying the oil at the recipient’s feet and gradually work your way upward.
This not only reduces friction but also allows the oil’s soothing properties to spread evenly across the body, enhancing the overall massage experience.
Step 3: Effleurage for Warm-up
Kickstart the full-body massage with effleurage strokes. Start at the legs and employ long, sweeping motions. Gradually move up to the arms, back, and neck.
Effleurage serves as a gentle warm-up, helping muscles relax and prepare for deeper massage techniques.
Step 4: Address Specific Areas
While massaging, be attentive to specific areas that may hold tension or discomfort. Employ targeted techniques like kneading and circular motions to address these areas effectively.
Paying close attention to these trouble spots ensures the recipient receives the maximum benefit from the massage.
Step 5: Legs and Feet
Dedicate ample time to massaging the legs and feet, as these regions often accumulate significant tension.
Apply thorough and methodical strokes to relax and rejuvenate these areas. Tension relief in the legs and feet can greatly contribute to the overall sense of relaxation.
Step 6: Finish with Relaxation
Wrap up the full-body massage with a sequence of gentle, calming strokes.
These soothing movements are designed to induce a deep state of relaxation, leaving the recipient feeling completely at ease.
This final step ensures the entire body is thoroughly relaxed and stress-free, concluding the massage experience on a high note.
Massage Techniques for Beginners
To become proficient in massage, it’s essential to master various techniques. Here are some fundamental techniques to practice:
- Effleurage: Long, sweeping strokes to warm up and soothe muscles.
- Petrissage: Kneading and squeezing muscles to release tension.
- Friction: Applying pressure with your thumbs or fingers in a circular motion to address knots.
- Tapotement: Rhythmic tapping or patting motions to invigorate the muscles.
- Stretching: Gently stretching the limbs and neck to enhance flexibility and relaxation.
Massage Tips for Beginners
| Tips for Beginners | Description |
| Communication | Always ask your recipient’s comfort level and adjust pressure accordingly. Effective communication ensures a customized and enjoyable massage. |
| Practice | Regular practice and consider a massage course to enhance skills. Practice and guidance improve techniques. |
| Warm Your Hands | Warm hands before starting; cold hands can be uncomfortable. |
| Maintain Good Posture | Avoid strain by maintaining proper body mechanics. |
| Use Relaxing Music | Enhance the experience with soothing music to promote relaxation. |
Final Thoughts on How to Give Massage at Home
Learning how to give a massage at home can be a rewarding skill.
By following these step-by-step instructions, you can provide your loved ones with a relaxing and rejuvenating experience.
Remember that practice makes perfect, and over time, you’ll become a skilled home masseuse capable of delivering the benefits of relaxation, stress relief, and muscle pain relief to those you care about.
FAQs
How Do You Give a Sensual Massage at Home?
To give a sensual massage, set a cozy atmosphere with soft lighting and music. Use warm, unscented oil and start with gentle strokes. Gradually increase pressure and communicate openly with your partner.
Keep it slow and intimate, focusing on their pleasure and connection.
How Do You Give a Massage for Beginners?
Begin with a peaceful environment, a comfy surface, and the right oil. Start gently with effleurage strokes, then progress to kneading.
Pay attention to knots and finish with relaxing strokes.
Maintain good posture and consider taking a massage course to improve your skills.
What Not to Do When Giving a Massage?
Avoid using excessive pressure, rushing, or distractions.
Never massage over injuries, cuts, or inflammation. Check for oil allergies and communicate throughout the massage. Ensure the recipient’s comfort and adjust accordingly.
How Do You Properly Massage Someone?
Proper massage involves creating a soothing environment and using suitable oil.
Begin with gentle effleurage strokes, address tension areas with kneading, and consider feedback. Pay attention to often-neglected areas like legs and feet.
Conclude with relaxing strokes for a tension-free, relaxed experience.